Showing posts with label crafty stuff. Show all posts

Wednesday, March 13, 2013

kiwi crate. {a giveaway!}


for christmas, nana got us a subscription to kiwi crate

i originally saw it on meg's blog and thought that it would be such a fun idea for my kids but didn't want to pay a subscription at $20 for a month for crafting supplies. 

but - y'all - it's SUCH a good deal. there's SO much in each box AND it is so fun to open it up and see what fun goodies come each month!


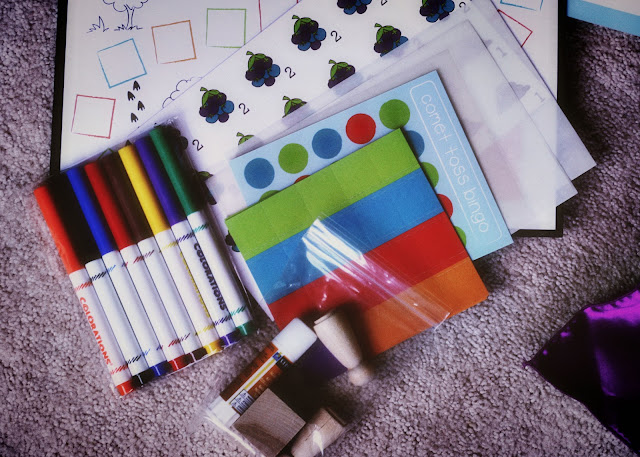
the first month we got a cute pair of scissors, pastels, watercolors, four postcards to paint & a game of penguin bowling. the littles thought that was SO much fun. 

each month seems to have a theme and the last box we opened was family game night. it included two games {and we haven't even done the board game yet!} it's such a good rainy day thing to have on hand. my kids seem to be bickering a lot lately {c. has learned that she doesn't necessarily have to do everything her brother tells her} and sometimes it's nice to open up our kiwi crate & have a slight break from the fighting. {until they both want the red marker!}   


i have been super impressed with kiwi crate, to say the least. you get so much packed in the little box and they always have a little pamphlet that has even more ideas for crafts, games & activities that go along with that theme! we will definitely be continuing our subscription when it runs out. it is such a fun idea!

so - today - i'm giving away a THREE MONTH SUBSCRIPTION to kiwi crate!!! {not a sponsored post - i just want you to see how great it is!}. i just know that you, too, will LOVE it as much as i do! i can't wait for you to see!


***********there are three chances to win:*********

for your first entry - leave a comment HERE telling me when you'd pull out the kiwi crate! right when you get it? a rainy day? when you're trying to cook dinner??

for your second entry - share this giveaway on ANY social media! facebook, instagram, your blog! {you can share on all three, but it only counts once!!} make sure to leave a comment HERE telling me you did this!

for your third entry - like my page on facebook & leave a comment HERE telling me that you're a fan on facebook!

GOOD LUCK! the giveaway will close on sunday night at 5 and i'll announce the winners here on monday morning!!!

have a great wednesday! i'm off to find my third cup of coffee!!

****remember, this is NOT sponsored by kiwi crate! i just wanted to share with you! all of us mommies can use a good rainy day supply of goodies, right???****

if you want to go ahead & order a kiwi crate - use this link & we will BOTH get $10 off!!!

Wednesday, February 13, 2013

a peek inside my studio.

 a project for a dear friend's wedding.....


post its are now my lifesaver. 


 a blank sign, hung and ready to be painted. i just can't decide what i'm going to do....


 from the hubbs's first truck. an 89 blue two door chevy blazer. love.


 this little muffin has her own signs she "paints" with me. all. the. time. i can't keep this place clean with her in it. she picks up sand paper and sands EVERYthing. whoa. gonna have to keep my eye on this one.


 fabric begging to be used.... soon, friend. soon.


happy wednesday. are you ready for valentine's day??

Thursday, January 31, 2013

a tutorial: easy peasy felt garland.


i received a few questions yesterday when i posted my afternoon craft on my instagram feed.  a little valentine love for my sad looking mantel.....

 
it really is so simple! 

i took some card stock and folded it in half. i drew hearts, elementary school style. and cut them out.
then i traced them {yes, with sharpie!} onto four colors of felt. i used sharpie because my washable fabric marker was not working well on the felt. and if you know me, i'm not one to get caught up in the details when it's something for myself. so i just cut inside the lines as best as i could. 


then i made four piles and started sewing with hot pink thread. no pinning or anything, i just grabbed them and stuck them through the sewing machine. {tip: if you need to lift up your presser foot, make sure to lower your needle first to keep your place!}


 {the burlap garland i made years ago is from a tutorial heather of whipperberry did! it's lasted a LONG time! the scrappier it gets the more i like it!}


an easy peasy tutorial for thursday! oh happy day!


Tuesday, November 13, 2012

{DIY} a knockoff hurricane.


a few weeks ago, i was at target {i mean, when am i NOT at target} and saw these from nate berkus:


hmmmm..... $25? and it wasn't even that large..... no thanks.

so when i saw this jute at joann {again - when am i NOT there?} i thought - i can totally make something with that!

supplies needed:
hurricane {from walmart floral section @ $3.99}
gluegun/gluestick {and in my case a glue plate!}
craft jute {mine was from joann at $4.99 - on sale}
a candle or flowers, depending on your use!


just warm up that hot glue gun and start painting on those lines.


pull the jute tight over the glue and press down for a few seconds. 

keep rolling the hurricane around and around.


since mine was a larger hurricane, i used a candle. {that smells JUST like tyler candles but at a fraction of the price. $3.99. NOT lying, folks. and smells every bit as good!}


and some moss from the craft store. it's probably not fireman approved {eek! my mom will kill me!} but i saw something similar on the beautiful megan's home tour from contented sparrow and had to copy. of course.


and that's that. a beautiful new refurbished hurricane. 

i also saw something similar here and pinned it! 

get your glue guns out! it's time to rock!


Tuesday, February 7, 2012

a valentine shirt.


last week i was looking for a valentine shirt for lil' miss and i didn't find anything that was what i had in mind. so i decided to make something for her. {trying to get my spunk back and all....}


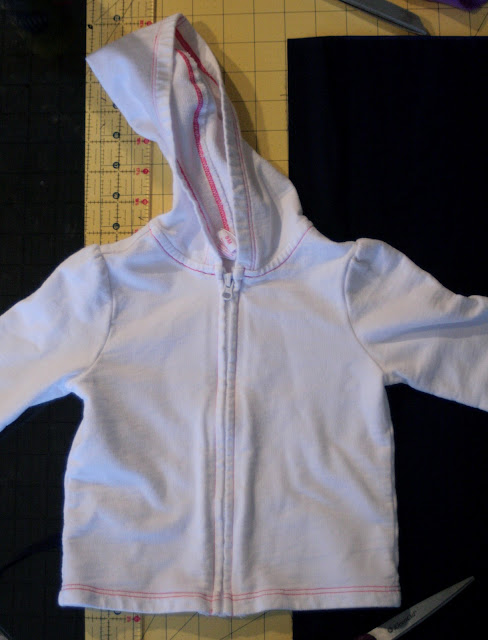
i started with a plain white hoodie that lil' miss had in her closet. a tad tight on her full belly, but it would work nonetheless.

i folded a piece of cardstock in half and cut a heart out to fit on the hoodie. cut it in half just to make sure it would fit on both sides.


then i cut 2 inch strips of fabric. i think i ended up with five, but i didn't even need that many. 


i just used scrap pieces of fabric that i had in my stash.

no money was spent on this project.


i sewed the strips, one by one, together long ways. right sides together. and then pressed them out straight.


a while back i found a great tutorial on applique. i can't remember where i saw it, but it started with this stuff. "Steam a Steam Lite". I got it at Joann a year ago for 3 dollars and i'm still working my way through the package.


the directions are pretty clear on the front, but basically you trace the design on one side of the applique paper. {that's a technical term by the way - NOT REALLY!}


and then you cut around it, stick onto the wrong side of the fabric and cut it out together.

usually it sticks {temporarily} to the wrong side of the fabric pretty good, but in this case, since there were seams, i had to get the back of the fabric strips nice and hot with an iron to get it to stick prior to cutting  the pieces out.


then i ironed the heart pieces onto the hoodie and top stitched it on.

but that wasn't enough.

i cut three more 2" strips of fabric and sewed them together to make one really long strip.


then i zig zag stiched the end. {see my settings above}. there's nothing technical about how i sew. it's trial and error, so this is what worked for me on my machine.


you keep it on the very edge of the fabric and the zig zag sort of pulls in the edge over itself, creating and interesting 'hem'. it wears cool as well. it kind of frays without completely fraying if that makes sense. i like it.

if that's not your style, you could always do a regular hem as well.


then i folded the raw edge in and pressed. this is going to be what i sew to the bottom of the hoodie.


my machine ruffles on it's own very well. i set the tension high and the stitch long and ruffles the fabric up great. no pulling necessary. 


i still had ruffle left after doing the bottom so i did the sleeves too. pinning it right underneat the hem of the original hoodie. i pulled out the basting stitch that was used to make the ruffle after everything was sewn together.


i'm not going to lie, the sleeve wasn't easy to maneuver on the machine.


but it was worth it. maybe one day i'll get lil' miss to hold still enough in daylight to take a pic of her in her new v-day outfit! she sure looks cute in it!


Tip Junkie handmade projects